Tag: ionic

  • Alphabetical Index with Ionic Virtual Scroll

    This post is an extension of the first post on a contacts lists with headers to break up the sections. You can read that here!

    I wanted to extend that example to show how we could add an alphabetical index on the side of the list. This was something that plagued me for a while. Then a quick Twitter conversation sparked my interest on it again. I wanted to solve this because I needed it for work and the current solution I had didn’t make me happy. The example I always referenced was Ross Martin’s ionic2-alpha-scroll. However, this needed to be modified a bit with newer versions of Ionic. That same Twitter conversation gave me a hint and I rolled with it.

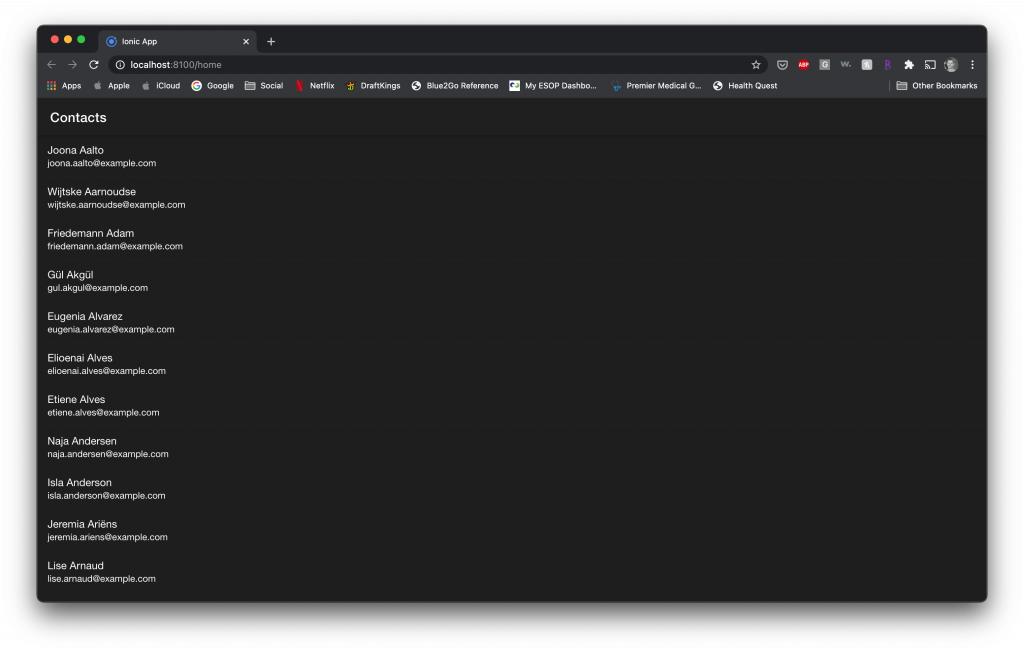
    My colleague Stephen and I came up with the ion-list pinned to side for that work project, but I wanted to bring it to everybody because I’m sure its gotta help someone! I searched for examples of something like this so many times. I’m sure this could help somebody out there. So, for this example, I started by adding the ion-list after the ion-virtual-scroll in the code. Then added in the styling Stephen wrote:

    //home.page.html
    <ion-header>
      <ion-toolbar>
        <ion-title> Contacts </ion-title>
      </ion-toolbar>
    </ion-header>
    
    <ion-content>
      <ion-virtual-scroll #vScroll [items]="contacts" [headerFn]="myHeaderFn">
        <ion-item-divider *virtualHeader="let header">
          {{ header }}
        </ion-item-divider>
        <ion-item *virtualItem="let item">
          <ion-label>
            <h2>{{item.name.first}} {{item.name.last}}</h2>
            <h4>{{item.email}}</h4>
          </ion-label>
        </ion-item>
      </ion-virtual-scroll>
      <ion-list #alphaList class="ion-alpha-sidebar">
        <ion-item
          *ngFor="let letter of alphabet"
          (click)="goLetter(letter)"
          lines="none"
        >
          {{letter}}
        </ion-item>
      </ion-list>
    </ion-content>
    // home.page.scss
    .ion-alpha-sidebar {
      position: fixed;
      right: 0px;
      top: 50px;
      bottom: 0px;
      display: flex;
      flex-flow: column;
      z-index: 50000;
      margin: 0px;
      ion-item {
        font-size: 16px;
        color: #ffffff;
        flex: 1 1 auto;
        display: flex;
        list-style: none;
        width: 60px;
        font-weight: 500;
        text-align: center;
        align-items: center;
        justify-content: center;
        cursor: pointer;
      }
    }
    
    @media screen and (max-width: 1024px) {
      .ion-alpha-sidebar {
        top: 50%;
        right: 0;
        transform: translate(0, -50%);
        padding: 0px;
        ion-item {
          width: auto;
          font-size: 14px;
          color: var(--ion-color-primary);
        }
      }
    }

    You can see from the HTML above that creating the alphabetical index is done by looping over an array holding the letters of the alphabet. The array is created by a for loop iterating over the proper character codes representing those letters. There is a click event attached to each of those letters to jump to the position in the corresponding ion-virtual-scroll list. The code for creating the alphabet, as well as the code for jumping to the appropriate section by letter, looks as follows:

    //home.page.ts
    ...
    export class HomePage implements OnInit, AfterViewInit {
      
      @ViewChild(IonContent) content: IonContent;
      @ViewChild("vScroll") public virtualScroll: IonVirtualScroll;
    
      public contacts: Array<Contact> = new Array<Contact>();
      public alphabet: String[] = [];
      ...
    
      constructor(private contactsService: ContactsService) {
        this.alphabet.push(String.fromCharCode(35));
        for (let i = 0; i < 26; i++) {
          this.alphabet.push(String.fromCharCode(65 + i));
        }
      }
      ...
      goLetter(letter: string) {
        const firstContact = this.contacts.find((c) => {
          return c.name.last.toUpperCase().charAt(0) === letter.toUpperCase();
        });
        const wantedIndex = this.virtualScroll.items.findIndex(
          (item) => item === firstContact
        );
        this.virtualScroll.positionForItem(wantedIndex).then((offset: number) => {
          this.content.scrollToPoint(0, offset);
        });
      }
      ...
    }

    So, the previous code first adds a # to the alphabet for any contact sorting starting with a numeric. Then, adding each letter thereafter, starting with A (represented by character code 65). We then have the function to jump inside the list. It finds the first contact in the sorted contacts array where the letter matches the first letter of the last name (in my case). Then it finds the index of that contact within the virtual list. Followed by scrolling the ion-virtual-scroll to that specific index.

    That’s pretty much all ya need for the side index!

    Group Headings Revisited

    In the previous post, linked at the top, I talked about how to create the section headers. However, since then, I’ve updated the code to be a bit more effective:

    //home.page.ts
    ...
    myHeaderFn = (record, recordIndex, records) => {
      let result = null;
      if (recordIndex !== 0) {
        const prevRec = records[recordIndex - 1];
        const currRec = record;
        const prevName = prevRec.name.last;
        const currName = currRec.name.last;
        if (prevName !== null && currName !== null) {
          let prevCharCode = prevName.toUpperCase().charCodeAt(0);
          let currCharCode = currName.toUpperCase().charCodeAt(0);
          if (prevCharCode !== currCharCode) {
            let prevChar = prevName.toUpperCase().charAt(0);
            let currChar = currName.toUpperCase().charAt(0);
            let prevIsLetter = this.isLetter(prevChar);
            if (!prevIsLetter) {
              let currIsLetter = this.isLetter(currChar);
              result = currIsLetter ? currName.toUpperCase().charAt(0) : null;
            } else {
              result = currName.toUpperCase().charAt(0);
            }
          }
        }
      } else {
        const name = record.name.last;
        if (name !== null) {
          let nameChar = name.toUpperCase().charAt(0);
          let headerChar = this.isLetter(nameChar) ? nameChar : "#";
          result = headerChar.toUpperCase();
        }
      }
      return result;
    };
    
    public isLetter(char: any): boolean {
      return /[a-zA-Z]/.test(char);
    }
    ...

    I now used the similar character code approach within the header function to create the alphabet. Using charCodeAt, we can compare two records using their number value. If we’re looking at the first index in the alphabetically sorted list, we simply set the header as #, if it’s a number, or the first character, if it’s a letter. Then, for the remaining list, we compare the number values. If they are not the same and the previous record was a number, we look at the current record’s first letter. If that’s a number, we leave the return as null. If it’s a letter, we return that letter. If the original character codes were not equal and the previous record started with a letter, then we simply return the current record’s first letter. It seems a bit complex, but isn’t too bad when you read through it a couple of times.

    Maybe you have an even slicker solution!? If you do, I’d love to see it!

    To get a copy of the source code, you can go here.


  • Login Form with Show/Hide Password Switch

    For me, I always appreciate when login forms give you an option to show the password I’ve typed in. It may seem commonplace, but all too often sites neglect to add this feature. It’s nothing more than a slight nuisance, but I appreciate being able to hit the toggle, show what I’ve typed so I don’t feel like I need to re-type everything if I think I’ve messed up. So, whenever I create an email/password login for my work projects, I make sure to include this feature.

    This is a very simple addition to a basic login form. First we setup our project, create a login page, and change the routing to go to this login page first. Of course, in a different terminal tab, we’ll serve the app to view realtime changes:

    $ ionic start ionic-login-hide-show blank --type=ionic-angular
    $ cd ionic-login-hide-show
    $ ionic g page login
    
    $ ionic serve

    Changing the first page to be the newly created login page requires modifying the app-routing.module.ts file as follows:

    // app-routing.module.ts
    ...
    const routes: Routes = [
      {
        path: "home",
        loadChildren: () =>
          import("./home/home.module").then((m) => m.HomePageModule),
      },
      {
        path: "login",
        loadChildren: () =>
          import("./login/login.module").then((m) => m.LoginPageModule),
      },
      {
        path: "",
        redirectTo: "login",
        pathMatch: "full",
      },
    ];
    ...

    After opening the newly created login.page.ts file, we’ll start to build out the form logic. This will include elements of the ReactiveFormsModule, so that will need to be imported to the login.module.ts file. We’ll build out a FormGroup with email and password fields, with some Validators to ensure users enter the correct information:

    // login.module.ts
    ...
    import { FormsModule, ReactiveFormsModule } from "@angular/forms";
    ...
    @NgModule({
      imports: [
        CommonModule,
        FormsModule,
        ReactiveFormsModule,
        IonicModule,
        LoginPageRoutingModule,
      ],
      declarations: [LoginPage],
    })
    export class LoginPageModule {}
    
    // login.page.ts
    import { Component, OnInit } from "@angular/core";
    import { FormBuilder, FormGroup, Validators } from "@angular/forms";
    ...
    export class LoginPage implements OnInit {
      loginForm: FormGroup;
    
      constructor(private formBuilder: FormBuilder) {
        this.loginForm = this.formBuilder.group({
          email: ["", Validators.compose([Validators.required, Validators.email])],
          password: ["", Validators.required],
        });
      }
    ...
    }

    Now that we have some form logic built out, we can place some HTML in place to get those inputs ready for the user to enter their email and password. Further, we’ll add a button for them to click to initiate the login process:

    <ion-header>
      <ion-toolbar>
        <ion-title>Login</ion-title>
      </ion-toolbar>
    </ion-header>
    
    <ion-content>
      <ion-card>
        <form [formGroup]="loginForm">
          <ion-item>
            <ion-label position="stacked">
              <ion-icon name="person-outline"></ion-icon>
              Email
            </ion-label>
            <ion-input type="email" formControlName="email">
            </ion-input>
          </ion-item>
          <ion-item >
            <ion-label position="stacked">
              <ion-icon name="lock-closed-outline"></ion-icon>
              Password
            </ion-label>
            <ion-input type="password" formControlName="password">
            </ion-input>
          </ion-item>
          <ion-button expand="block" type="submit">
            Login
            <ion-icon name="log-in-outline"></ion-icon>
          </ion-button>
        </form>
      </ion-card>
    </ion-content>

    Now that we have all of that taken care of, we can get to the important part, which is the icon to show and hide the password. Inside of the password item, we’ll add an icon, which has an on click action of toggling the password’s visibility. This function entails toggling a boolean for showing the password or not. Further, it will control which icon is shown. However, that won’t get the job done. We’ll also need to add some logic in the HTML to change what type of input the password field is. The type will be determined by the aforementioned boolean. Without this piece, we wouldn’t be able to actually visibly see the password at all. The other pieces are nice and all, but changing the input type is what really matters.

    // login.page.html
    ...
    <ion-item >
      <ion-label position="stacked">
        <ion-icon name="lock-closed-outline"></ion-icon>
        Password
      </ion-label>
      <ion-input
        [type]="showPwd ? 'text' : 'password'"
        formControlName="password"
      >
      </ion-input>
      <ion-icon
        slot="end"
        [name]="pwdIcon"
        (click)="togglePwd()"
      >
      </ion-icon>
    </ion-item>
    ...
    // login.page.ts
    ...
    export class LoginPage implements OnInit {
      loginForm: FormGroup;
      pwdIcon = "eye-outline";
      showPwd = false;
    ...
      togglePwd() {
        this.showPwd = !this.showPwd;
        this.pwdIcon = this.showPwd ? "eye-off-outline" : "eye-outline";
      }
    }

    So, with that, we can see that the password field type changes from 'text' to 'password' depending on the boolean value. The icon changes along with it to show you which type you’d be changing the field too. One thing to note is the the showPwd field should start as false. This way, the user gets what you’d expect first… the password is hidden. All together, it looks like this:

    Some notes

    There are certainly some improvements that could be made to this form, such as:

    • Showing text below the form fields indicating any errors.
    • Disabling the Login button unless the form is valid.
    • Not showing the show/hide button until a password has been typed.

    Let me know if that is something you’d like me to add in a part two!

    To get a copy of the full code example, check out the Github repo here.


  • Ionic Virtual Scroll with Headers

    We all have apps where we need to display a long list of contacts or users of some sorts. It could be a list of friends, co-workers, phone contacts, or plenty of other use cases. Nevertheless, ion-virtual-scroll comes in handy to create these lists because it comes with built-in performance benefits. As Ionic says in their documentation, “not every record in the list is rendered at once; instead a small subset of records (enough to fill the viewport) are rendered and reused as the user scrolls.” This makes for a smooth scrolling experience for potentially very long lists with heavy data.

    We will start by creating a new blank Ionic Angular project, navigate into that directory, and serve it so we can begin to see the changes while we code:

    $ ionic start ionic-vs-example blank --type=ionic-angular
    $ cd ionic-vs-example
    $ ionic serve

    When opening the newly created project, we will have the default blank project setup. We can then generate a service to handle the logic for pulling in our fake contacts data for this example:

    $ ionic g service contacts

    After opening up the new contacts.service.ts file we can add a function to request contacts from our API. Our page will ping this API on initialization and subsequently fill the virtual list. In this case, I’m going to use randomuser.me to simulate a potential requests for contacts data. In order to make this web request, we’ll first need to import the HttpClientModule inside of app.module.ts, as well as importing HttpClient into the contacts service itself. Then, we can use the HttpClient to ping our API for some results. This should look something like the following:

    // app.module.ts
    ...
    import { HttpClientModule } from "@angular/common/http";
    
    @NgModule({
    ...
      imports: [
        BrowserModule,
        IonicModule.forRoot(),
        AppRoutingModule,
        HttpClientModule,
      ],
    ...
    })
    export class AppModule {}
    // contacts.service.ts
    import { Injectable } from "@angular/core";
    import { HttpClient } from "@angular/common/http";
    
    @Injectable({
      providedIn: "root",
    })
    export class ContactsService {
      constructor(private http: HttpClient) {}
    
      getContacts() {
        return this.http.get<any>("https://randomuser.me/api", {
          params: {
            results: "300",
          },
        });
      }
    }

    In order to properly use the contacts’ properties, you could create an interface for your API’s results to give context for each object. In doing so, it would look like this:

    // contact.ts
    export interface Contact {
      name: ContactName;
      email: string;
    }
    
    export interface ContactName {
      title: string;
      first: string;
      last: string;
    }

    Now, inside of our home.page.ts file, we can ping the contacts.service.ts for a list of contacts and assign the results to our global contacts variable. This variable will hold our array of contacts that will be used to build the virtual list.

    import { Component, OnInit } from "@angular/core";
    import { Contact } from "../contact";
    import { ContactsService } from "../contacts.service";
    
    @Component({
      selector: "app-home",
      templateUrl: "home.page.html",
      styleUrls: ["home.page.scss"],
    })
    export class HomePage implements OnInit {
      contacts: Array<Contact> = new Array<Contact>();
    
      constructor(private contactsService: ContactsService) {}
    
      ngOnInit() {
        this.contactsService.getContacts().subscribe((res) => {
          this.contacts = res["results"];
          console.log(this.contacts);
        });
      }
    }

    Since we have an array of contacts, we can now finally setup our home.page.html file to show the virtual list. The ion-virtual-scroll accepts these contacts and allows us to create virtual items for each. We’ll loop over the contacts in the html and show the contact’s full name and email address:

    //home.page.html
    <ion-header [translucent]="true">
      <ion-toolbar>
        <ion-title> Contacts </ion-title>
      </ion-toolbar>
    </ion-header>
    
    <ion-content [fullscreen]="true">
      <ion-virtual-scroll [items]="contacts">
        <ion-item *virtualItem="let item">
          <ion-label>
            <h2>{{item.name.first}} {{item.name.last}}</h2>
            <h4>{{item.email}}</h4>
          </ion-label>
        </ion-item>
      </ion-virtual-scroll>
    </ion-content>

    The resulting virtual list will scroll seamlessly, loading only the content that is visible within the DOM:

    List Headers

    Once we have a smooth scrolling list, it’s common that we’d want to group the contacts by some sort of alphabetical order. In this case, I want to sort the contacts by their last name. So first, we’ll want to modify the sorting order to put the contacts in order by their last name. That will result in something like the following:

    The next step will be to break up the contacts using headers. Headers will be used to break up the contacts by the first initial of their last name. This will create a definitive grouping that will make it easier to identify the contact you’re looking for. Ionic’s ion-virtual-scroll allows you to inject a header function on the list. This header function gives you access to the contacts for comparison so you can determine where to put the header. We’ll create the header function and look for when the first initial of the last name of one contact does not match the next. That’s where we’ll place the header. The code will look as follows:

    // home.page.html
    ...
    
    <ion-content [fullscreen]="true">
      <ion-virtual-scroll [items]="contacts" [headerFn]="myHeaderFn">
        <ion-item-divider *virtualHeader="let header">
          {{ header }}
        </ion-item-divider>
        <ion-item *virtualItem="let item">
          <ion-label>
            <h2>{{item.name.first}} {{item.name.last}}</h2>
            <h4>{{item.email}}</h4>
          </ion-label>
        </ion-item>
      </ion-virtual-scroll>
    </ion-content>
    // home.page.ts
    ...
    export class HomePage implements OnInit {
      ...
    
      myHeaderFn = (record, recordIndex, records) => {
        let result = null;
        if (recordIndex !== 0) {
          const c1 = record;
          const c2 = records[recordIndex - 1];
          if (c1.name.last != null && c2.name.last != null) {
            if (
              c1.name.last.charAt(0).toUpperCase() !==
              c2.name.last.charAt(0).toUpperCase()
            ) {
              result = c1.name.last.charAt(0).toUpperCase();
            }
          }
        } else {
          const name = record.name.last;
          if (name != null) {
            result = name.charAt(0).toUpperCase();
          }
        }
        return result;
      };
    }

    The myHeaderFn looks at the current record and the previous record, so long as we’re not at the first item in the list. At the first index, we simply return the first character of the last name. For the remaining indexes, we look to see if the first letter of the current last name is the same as the previous. If it is, we keep moving by returning null, if not we return that new letter. The results is as follows:

    Conclusion

    That’s it! You now have a virtual list, with smooth scrolling, broken into sections by the contact’s last name. There are obviously countless ways to extend this further for your needs. One way would be to create a clickable index to jump between these sections. Maybe that will be in another tutorial 🙂

    To find the full code for this demo, click here.

    A more updated version of this post can be found here.


  • Watch for Network Status Changes with Capacitor

    One of the key elements of every Progressive Web App (PWA) is that they are offline capable. This means that regardless of whether the user currently has Internet connectivity, they should still be able to use your app with cached data returned. While this post isn’t going to go into the finer details of caching data, I wanted to highlight how you could demonstrate to the user that they are viewing cached data. Further, since some features may not be usable when offline, you may want to alert the user if they try to perform such an action because that data may be lost.

    Changing your app’s header color is a great way to make it clear to the user that they are in “offline” mode. So, in this example, when the user doesn’t have Internet connectivity, we will turn the header red. Conversely, when the user does have Internet connectivity, the header will remain the app’s primary color.

    We will start by creating a new blank Ionic Angular project, with Capacitor included, navigate into that directory, and serve it so we can begin to see the changes while we code:

    $ ionic start network-watcher blank --type=ionic-angular --capacitor
    $ cd network-watcher
    $ ionic serve

    When opening the newly created project, we will have the default blank project setup. We can then generate a service to handle the network watcher logic:

    $ ionic g service network

    After opening up the new network.service.ts file we can add a plugin listen handler for the Network. As it listens to the “networkStatusChange” message, we can emit the new NetworkStatus via a BehaviorSubject. We can also create a getter method that can be used from our home page to observe these emitted changes. This should look something like the following:

    // network.service.ts
    ...
    import { NetworkStatus, PluginListenerHandle, Plugins } from "@capacitor/core";
    const { Network } = Plugins;
    ...
    export class NetworkService implements OnDestroy {
      private handler: PluginListenerHandle;
      private status = new BehaviorSubject<NetworkStatus>(null);
    
      constructor() {
        this.handler = Network.addListener("networkStatusChange", (status) => {
          console.log("Network status changed", status);
          this.sendStatusChangeMsg(status);
        });
      }
      ...
      public getStatusChangeMsg(): Observable<NetworkStatus> {
        return this.status.asObservable();
      }
    
      private sendStatusChangeMsg(status: NetworkStatus): void {
        this.status.next(status);
      }
    }

    From the home page we will listen to the changes via a Subscription to the NetworkService‘s getter. When a change is observed, we can set a public variable for the connected status. That connected variable will be referenced in the home.page.html file to update the ion-header‘s color. This will look something like this:

    // home.page.ts
    ...
    export class HomePage {
      public connected = true;
    
      constructor(private networkService: NetworkService) {
        this.setupSubscriptions();
      }
    
      private setupSubscriptions() {
        this.networkService.getStatusChangeMsg().subscribe((res) => {
          if (res) {
            this.connected = res.connected;
          }
        });
      }
    }
    <!-- home.page.html -->
    
    <ion-header [translucent]="true">
      <ion-toolbar [color]="connected ? 'primary' : 'danger'">
        <ion-title> Network Watcher </ion-title>
      </ion-toolbar>
    </ion-header>
    
    <ion-content [fullscreen]="true">
      ...
    </ion-content>

    After creating the service to emit the changes, accepting those change’s inside of the page, and updating the color property depending on the connectivity status, you should see this:

    You can mimic Internet connectivity changes by using the Network tab in the inspector and toggling Online and Offline.

    Outside of changing the header color, one alternative route would be to use Capacitor’s Toast plugin to alert the user of network changes as well. To do this, we would add the Toast plugin to home.page.ts. But first, Ionic’s pwa-elements need to be installed and added to the main.ts file. I would kill the app and re-serve after making this change. Then, after updating the variable holding the connectivity status, we can call a separate function to show a Toast for a short duration. This would look as follows:

    $ npm install @ionic/pwa-elements
    // main.ts
    ...
    import { defineCustomElements } from "@ionic/pwa-elements/loader";
    ...
    // Call the element loader after the platform has been bootstrapped
    defineCustomElements(window);
    // home.page.ts
    ...
    import { Plugins } from "@capacitor/core";
    const { Toast } = Plugins;
    ...
    export class HomePage {
      ...
      private setupSubscriptions() {
        this.networkService.getStatusChangeMsg().subscribe((res) => {
          if (res) {
            this.connected = res.connected;
          }
          this.showNetworkChgToast();
        });
      }
    
      private async showNetworkChgToast() {
        await Toast.show({
          text: `Network Connectivity: ${this.connected ? "Online" : "Offline"}`,
          duration: "short",
        });
      }
    }

    All of that will result in the following results:


    That’s all for now! You can find the full code example here.